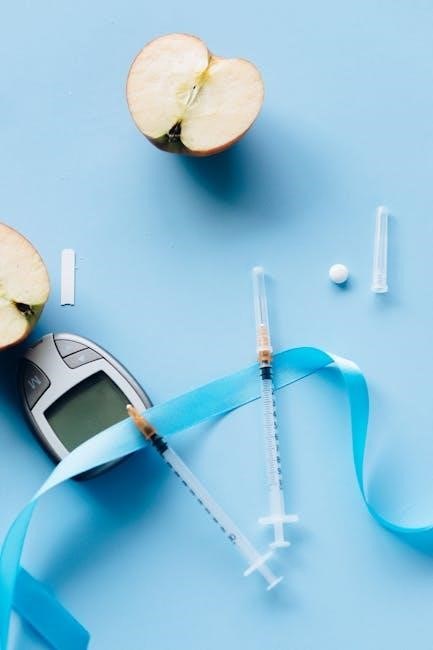
The Aviva Glucose Meter is a compact‚ user-friendly device designed for accurate blood glucose monitoring‚ ideal for managing diabetes effectively at home or on the go.
1.1 Overview of the Aviva Glucose Meter
The Aviva Glucose Meter is a sleek‚ compact device designed for easy blood glucose monitoring. It offers accurate readings‚ a user-friendly interface‚ and portable design‚ making it ideal for daily use. With features like a backlit display and minimal blood sample requirements‚ it ensures convenience and comfort for people managing diabetes. Its robust design and reliable performance make it a trusted choice for home and on-the-go testing.
1.2 Importance of Proper Usage
Proper usage of the Aviva Glucose Meter ensures accurate blood glucose readings‚ which are crucial for effective diabetes management. Incorrect use can lead to misleading results‚ potentially affecting treatment decisions. Always follow the manual’s instructions to maintain device performance‚ safety‚ and reliability. Proper technique prevents errors‚ ensuring consistent and precise monitoring‚ which is essential for managing your health effectively.
Unboxing and Initial Setup
Unboxing and setting up your Aviva Glucose Meter is an exciting first step. This section provides an overview‚ with detailed components and step-by-step instructions following.
2.1 What’s Included in the Box
Your Aviva Glucose Meter box contains the meter‚ a pack of test strips‚ a lancet device with sterile lancets‚ a carry case‚ a user manual‚ and a quick-start guide.
2.2 First-Time Setup Instructions
Insert the battery‚ set the date and time using the menu‚ and load a test strip to activate the meter. Review the user manual for detailed steps to ensure proper setup and functionality.
Key Features of the Aviva Glucose Meter
The Aviva Glucose Meter offers a compact design‚ advanced accuracy‚ and a user-friendly interface‚ making it an essential tool for efficient blood glucose monitoring and diabetes management.
3.1 Design and Portability
The Aviva Glucose Meter features a sleek‚ lightweight design‚ making it highly portable. Its compact size and ergonomic shape ensure ease of use and convenient carrying in a purse or pocket. The device is travel-friendly‚ with a durable construction that withstands daily use. Its portability makes it ideal for monitoring blood glucose levels anytime‚ anywhere‚ without compromising on accuracy or performance.
3.2 Technical Specifications
The Aviva Glucose Meter operates with advanced technology‚ providing accurate readings in just a few seconds. It requires a small blood sample size and offers a wide testing range. The meter is compatible with Aviva test strips and has memory storage for up to 500 readings‚ with date and time stamping. It also features a large‚ easy-to-read LCD display for clear results.
Operating the Glucose Meter
This section guides you through the basic operations of the Aviva Glucose Meter‚ including turning it on/off‚ navigating the menu‚ and performing essential functions for glucose testing.
4.1 Turning On and Off the Device
To turn on the Aviva Glucose Meter‚ press and hold the power button until the display lights up. The device will perform a self-test and display the start screen. To turn it off‚ press and hold the same button until the screen goes dark. Ensure the device is off when not in use to conserve battery life. The meter also features an automatic shutdown after a period of inactivity.
4.2 Navigating the Menu
Navigate the Aviva Glucose Meter’s menu using the up and down arrows to scroll through options. Press OK to select a menu item and back to return to the previous screen. The main menu includes options like test history‚ settings‚ and unit of measure. Use the arrows to adjust settings and press OK to confirm changes. The menu is intuitive‚ ensuring easy access to all features.
Testing Your Blood Glucose
Testing your blood glucose with the Aviva Meter involves collecting a small blood sample and inserting a test strip into the meter for an accurate reading.
5.1 Preparing for a Test
Wash your hands with soap and dry thoroughly. Gather the Aviva Meter‚ test strips‚ and lancet. Turn on the meter and insert a test strip to activate it. Prick the side of your fingertip with the lancet‚ collecting a small blood sample. Ensure the blood droplet is large enough for accurate results. Avoid touching the test strip’s reactive area to prevent contamination.
5.2 Conducting the Test
Apply the blood sample to the test strip’s reactive area; The meter will automatically analyze the sample. Wait for the result to appear on the backlit display. The meter typically takes 5 seconds to provide accurate glucose readings. Follow any on-screen instructions for additional steps. Ensure the test strip fills completely for precise results. Store the used strip safely after testing.
Understanding Your Results
Understanding your glucose results is crucial for managing diabetes effectively. The Aviva Glucose Meter provides accurate readings to help you track and monitor your blood sugar levels precisely.
6.1 Interpreting Glucose Readings
Interpreting glucose readings is essential for diabetes management. The Aviva Glucose Meter displays blood sugar levels in mg/dL or mmol/L. Normal readings typically fall below 140 mg/dL (7.8 mmol/L) when fasting and under 180 mg/dL (10 mmol/L) after meals. Elevated readings may indicate hyperglycemia‚ while unusually low readings signal hypoglycemia. Consistently tracking these readings helps identify patterns and guide treatment adjustments to maintain healthy blood sugar levels.
6.2 Setting and Monitoring Goals
Setting realistic blood glucose goals helps manage diabetes effectively. Consult your healthcare provider to establish target ranges based on your health needs. Regularly monitor your readings to track progress and identify trends. Adjust your diet‚ exercise‚ or medication as needed to stay within your goals. Consistent monitoring and timely adjustments ensure better glucose control and overall health outcomes.

Maintenance and Care
Regular maintenance ensures optimal performance of your Aviva Glucose Meter. Clean the device as instructed‚ store it properly‚ and check the battery level regularly for reliable functioning.
7.1 Cleaning the Glucose Meter
Clean the Aviva Glucose Meter regularly to ensure accuracy and longevity. Use a soft‚ dry cloth to wipe the exterior. For stubborn spots‚ dampen the cloth lightly with water. Avoid alcohol-based cleaners or harsh chemicals. Clean the test strip port gently with a dry cloth after each use to prevent residue buildup. Ensure the device is dry before storing or using it again.
7.2 Replacing the Battery
To replace the battery‚ locate the battery compartment on the back of the device. Open it using a coin or screwdriver. Remove the old battery and insert the new one‚ ensuring the polarity matches the diagram. Close the compartment securely. Turn the device on to confirm it powers up. Refer to the manual for recommended battery type. Dispose of the old battery responsibly following local guidelines.
Troubleshooting Common Issues
The Aviva Glucose Meter may encounter issues like error codes or connectivity problems. Always refer to the user manual for step-by-step solutions to resolve these common concerns effectively.
8.1 Error Messages and Solutions
The Aviva Glucose Meter displays error codes like “E-1” or “E-2” for issues such as invalid test strips or low battery. Refer to the manual for specific solutions‚ like replacing the battery or using compatible strips. Ensure the device is clean and strips are handled correctly to avoid errors. If problems persist‚ contact customer support for assistance.
8.2 Resolving Connectivity Problems
If the Aviva Glucose Meter fails to connect to your device‚ ensure Bluetooth is enabled and the meter is in pairing mode. Restart both devices and check for app updates. If issues persist‚ reset the meter by holding the power button for 10 seconds and try pairing again. Contact customer support if connectivity problems remain unresolved.

Safety Precautions
Always handle test strips and lancets with care to avoid injury. Dispose of biohazardous materials properly and keep the device out of reach of children.
9.1 Handling Test Strips Safely
Handle test strips with clean‚ dry hands to ensure accuracy. Store them in their original container‚ away from direct sunlight and moisture. Avoid touching the test area to prevent contamination. Use strips before their expiration date and discard any damaged or expired strips properly. Always follow the manufacturer’s guidelines for safe handling and disposal.
9.2 Disposing of Biohazardous Materials
Dispose of used test strips‚ lancets‚ and other biohazardous materials in a sealed‚ puncture-proof container. Do not throw them in regular trash to prevent environmental contamination. Follow local regulations for biohazard disposal. Always wash your hands after handling such materials. Ensure proper disposal to maintain safety and prevent potential health risks.
Storing the Glucose Meter
Store the Aviva Glucose Meter in a cool‚ dry place‚ away from direct sunlight and moisture. Keep it in its protective case when not in use to prevent damage and ensure optimal performance.
10.1 Proper Storage Conditions
Store the Aviva Glucose Meter in a dry‚ cool environment with temperatures between 39°F and 86°F (4°C and 30°C). Avoid exposure to humidity above 80% to prevent damage. Keep the device away from direct sunlight‚ chemicals‚ or extreme temperatures. Use the original carrying case for protection. Do not store in bathrooms or vehicles. Ensure the meter is placed on a flat‚ stable surface when stored or transported.
10.2 Transporting the Device
When transporting the Aviva Glucose Meter‚ use the provided carrying case to protect it from shocks and scratches. Ensure the device is secure and avoid exposure to extreme temperatures or moisture. Keep it away from direct sunlight and chemicals. Store test strips separately in their original packaging to maintain accuracy. Always handle the meter with care to prevent damage during travel.
Warranty and Support
The Aviva Glucose Meter is backed by a limited warranty covering manufacturing defects. For support‚ contact customer service via phone‚ email‚ or visit the official website for assistance and resources.
11.1 Understanding the Warranty
The Aviva Glucose Meter warranty covers defects in materials and workmanship for a specified period. It typically includes repairs or replacements free of charge‚ provided the device is used as directed. Warranty duration and terms vary by region and are outlined in the product manual or manufacturer’s website for detailed information.
11.2 Contacting Customer Support
For assistance with the Aviva Glucose Meter‚ contact customer support via phone‚ email‚ or live chat. Visit the official website for contact details and operating hours. Support is available to address technical issues‚ troubleshooting‚ and warranty inquiries. Ensure you have your device serial number ready for faster service.
The Aviva Glucose Meter is an effective‚ easy-to-use tool for managing blood glucose levels. By following the guidelines‚ users can monitor their health confidently and efficiently.
12.1 Summary of Key Points
The Aviva Glucose Meter offers a portable‚ accurate‚ and user-friendly solution for blood glucose monitoring. Key features include quick results‚ easy navigation‚ and essential tools for effective diabetes management. Proper usage‚ regular maintenance‚ and adherence to safety guidelines ensure optimal performance. By following the manual‚ users can confidently monitor their health‚ making informed decisions to maintain glucose levels within target ranges.
12.2 Final Tips for Effective Use
For optimal use‚ ensure consistent testing‚ carry extra test strips‚ and keep the meter charged. Regularly review your results to track progress and adjust your diabetes management plan as needed. Always follow proper cleaning and storage guidelines to maintain accuracy and longevity of the device. Consult healthcare professionals for personalized advice to achieve better glucose control and overall health outcomes.